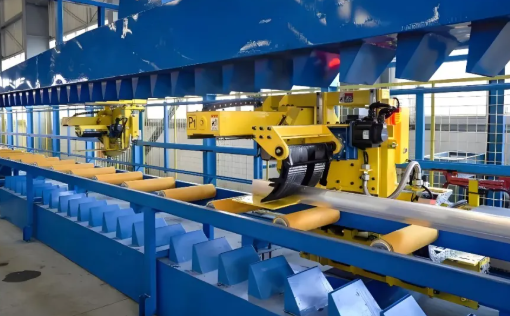
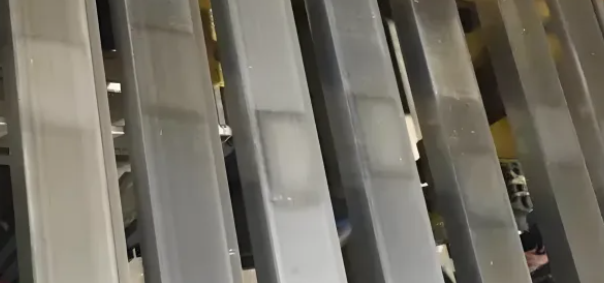
Aluminum extrusion is often described as “the art of metal flow.”
Behind what appears to be a straightforward forming process lies a complex interplay of thermodynamics, microstructural evolution, metal-flow behavior, and equipment–process coupling. Even the smallest fluctuation can leave a visible imprint on the product surface or internal structure.
As experienced technicians often say: “Every defect is a technical note jointly written by the machine, the die, and the process.”
This article examines typical extrusion defects by exploring their underlying mechanisms, metal-flow behaviors, and actionable corrective strategies—providing a set of solutions that can truly be implemented on the shop floor.
Chapter 1 — Internal Structural Defects
1. Pipe-End Shrinkage: The Persistent Problem at the End of Extrusion
Pipe-end shrinkage commonly occurs during the final segment of extrusion. Depending on its location and geometry, it can be categorized into:
Type I: Funnel-shaped central shrinkage
Type II: Ring-shaped shrinkage located at 1/2 radius
Type III: Shallow shrinkage 0.5–2 mm beneath the surface
Formation Mechanisms
Near the extrusion tail, contaminants accumulated in the container’s stagnant zones enter the metal flow. Insufficient discard length reduces the material’s feeding capability, resulting in Type I shrinkage. When the extrusion pad deforms or develops local bulges, metal-flow paths change, producing shrinkage in specific radial regions.
Corrective Measures
(1) Optimize discard management
Soft alloys: discard ≥10% of billet diameter
Hard alloys: discard ≥15%
Tail-cut length ≥ 2 × product diameter
(2) Ensure stable equipment condition
Check pad flatness weekly
Verify container alignment monthly
(3) Control end-of-stroke behavior
Follow a “slow–steady–gentle” speed profile
Maintain container temperature at 400–450°C
2. Peripheral Coarse-Grain Band: A Hidden Boundary Revealed After Heat Treatment
The coarse-grain ring appears after heat treatment and typically forms near the outer surface of the cross-section.
Mechanism
Heterogeneous stored energy increases recrystallization driving force near the surface.
Non-uniform second-phase particle distribution weakens grain-boundary pinning.
The combination produces a coarse-grain region.
Mitigation Approach
(1) Die optimization: improving flow uniformity
Multi-port die structures
Balanced bearing lengths to reduce friction variation
(2) Temperature management
Gradient heating (300→450→530°C, 30 min each)
Extrusion temperature limits: 6xxx ≤520°C, 2xxx ≤480°C
(3) Alloy composition adjustments
Add 0.1–0.3% Mn to suppress recrystallization
Maintain Fe/Si ratio between 1.5–2.0
3. Poor Seam Welding: The Critical Weakness of Hollow Profiles
Hollow profiles rely on porthole-die welding chambers for metal bonding. Insufficient welding pressure, low cleanliness, or inadequate temperature can lead to delamination or incomplete welding.
Root Causes
Insufficient welding pressure: improper inlet/port ratio
Low temperature: reduced metal plasticity
Contamination: oil or oxide residues blocking diffusion bonding
Solutions
(1) Improve welding-chamber design
Two-stage chambers (8–10 mm / 12–15 mm)
Main-to-secondary port area ratio ≈ 1.2 : 1
(2) Strengthen process control
Welding temperature for 6xxx alloys ≥540°C
Welding pressure ≥250 MPa
(3) Enhance cleanliness
Billet scalping depth ≥1 mm
All tools thoroughly cleaned with acetone
Chapter 2 — Surface Quality Defects
4. Blisters and Peeling: A Dual Attack from Gas and Interface Problems
Blisters
Moisture or oil on tooling decomposes into gas under high temperature
Air pockets trapped in worn zones of the container are released during extrusion
Peeling
Poor cleaning during alloy changeover
Surface flow-speed mismatch causing delamination
Control Strategy
Equipment:
Container–tool clearance: new ≤0.5 mm; worn ≤1.2 mm
Replace tools exceeding 0.3 mm wear
Process:
Independently control billet, container, and die temperatures
Stepwise heating (200→350→450°C → target)
Operation:
“Five-step cleaning”: brush → wipe → dry → inspect → use
Dual-person verification during alloy changeover
5. Scratches and Scuff Marks: Direct Physical Damage on the Surface
Scratches are linear and consistent, while scuff marks appear in bundles with metal debris attached.
Corrective Measures
(1) Reinforce conveying and guiding systems
Ceramic guide shoes (HRC ≥85)
Polyurethane-coated rollers (≥5 mm)
(2) Maintain die-surface condition
Polishing each shift (Ra ≤0.4 μm)
Rework when nitrided layer <0.05 mm
(3) Improve shop-floor cleanliness
Remove debris every 2 hours
Use nylon slings with ≤80% load
6. Orange Peel and Rough Surface (Matte/Ripples)
Orange peel
Caused by coarse grains (>100 μm) or >30% deformation mismatch between surface and core.
Matte or roughness
Results from die-surface degradation—loss of hardness, surface damage, or aluminum buildup.
Control Measures
Homogenization: 580°C × 8 h + rapid cooling (≥200°C/h)
Composite die strengthening: HRC50 base + 0.08 mm nitriding
Segmented extrusion speed: start ≤1 mm/s; steady 2–3 mm/s
Chapter 3 — Dimensional and Shape Defects
7. Twist, Bend, and Wave: Symptoms of Non-Uniform Flow and Temperature Fields
Diagnostic Indicators
Flow-speed difference across die >15%
Cross-sectional temperature difference >30°C
Poor control of stretching ratio
Integrated Correction
Flow simulation to optimize die design
Add 0.5–1.0 mm flow channels at key locations
Use laser-shape measurement with feedback control
Implement isothermal extrusion with zoned cooling
8. Flaring and Pinching: Post-Deformation from Residual Stress
Uneven cooling + differential elastic recovery = shape distortion at the exit.
Control Measures
Symmetry of die ports ≥95%
Bearing-length variation ≤1 mm
Use multi-roll straighteners (gap accuracy ±0.1 mm)
Maintain tension within ±5%
Chapter 4 — Special Defects
9. Chatter Marks: A Coupling Vibration of Machine, Die, and Process
Essentially a periodic fluctuation originating from resonance between equipment, die, and process parameters.
Control Measures
Spindle runout ≤0.05 mm
Hydraulic-pressure fluctuation ≤2%
Pre-stressed die structures
Adjust extrusion speed within ±10%
Use vibration sensors for monitoring
10. Stop Marks and Instantaneous Imprints: Transient Instabilities
Mechanism
Sudden velocity changes causing stick–slip on die bearings
Die temperature drift during pauses
Prevention
Constant-speed extrusion (fluctuation ≤±0.1 mm/s)
Die temperature stability ±5°C
Apply nano-coatings to lower surface energy
Combined mechanical + electrolytic polishing
Controlled acceleration/deceleration (≥30 s / ≥20 s)
Chapter 5 — Building a Full-Process Defect-Prevention System
Extrusion defects rarely originate from a single cause. A closed-loop quality system is essential.
1. Establish a Defect Early-Warning System
Online monitoring: temperature, speed, flow
Prediction models forecasting 24-hour risk
2. Standardize Operations
Standard operating procedures for extrusion
Die-use and maintenance manuals
3. Implement Total Quality Management
Training in defect recognition
Link incentives to quality performance
4. Create a Long-Term Improvement Mechanism
Monthly process reviews
Quarterly optimization projects
Digital equipment upgrades
Joint R&D with research institutes
Conclusion
Aluminum extrusion is a continuously evolving technology. Every extrusion line, every die, and every parameter influences final quality. Only by understanding the physical and microstructural nature of defects can we design effective, root-level prevention strategies—achieving more stable production and more reliable products.
Post time: Dec-06-2025


